Boutique Guitar Pedals, Effects and Project Studio |
|
|
Home
Contact Us Kill Strat Hum Music Tech Our Music About Us
For over 30 years we have been prototyping guitar processing. This now seems to actually be a viable thing to do, as BOSS pedals aren't the value they once were, and people are after non mass produced sounds. The day of Boutique Gear is here.
We were originally an electronics design engineer at Fairlight Instruments in the early 1980s, refining the digital and analog electronics of their sampling music workstation, and went to Roland Corporation Japan for 15 years to be involved with things like the Roland A-50, A-80, A-880, COSM, VP-9000, R-8 human drum machine and other stuff. So we have had a bit to do professionally with music technology.
Notes on studio software, hardware and acoustics for recording are also included below...
Last Updated: Apr 25 2024
Studio 2024 Kyoto Japan
Much has changed since I last updated this. Significant being we moved back to Japan and are now in Kyoto. We have a much smaller studio space, with no room for acoustic treatment.

Open back AKG headphones and SPAN spectrum analyser used more often these days during mixing and mastering. Do have some Yamaha tower speakers on a small stereo to check mixes on, but listening to all music on headphones is now far more our thing. Barely drive any more, so aren't checking mixes to and from driving to work like I used to.

I am using VR mix to help with having a standard mix and mastering studio on headphones. It doesn't hurt the process. But the reality is few listen to anything I release these days, so I only have to please myself. The rest of this page is about 10 years old, but the play list at the end has recent tracks in it.
Guitar Pedals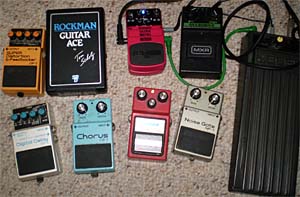
Most guitarists are always on the look out for 'that sound". Pedals are part of that search, but it isn't easy, as there are so many styles played, and what is good for one, isn't good for another. You can buy pedal boards with hundreds of patches on board, but most people only need two or three. The folk law around pedals also clouds the picture. There are folks out there that say they want 'the original sound of a 741' in their DOD250. No you don't! The 741 opamp was very noisy, and noise is NOT Vintage! One of our objectves is ultra low noise. Development
Lots of listerning is involved. The circuit diagrams of all the classic divices are around on the net, and there are some places that produce clones, as kits or otherwise. We have EQ, soft and hard solid state clipping, and the overdrive produced by a 12AX7 tube. Dicast boxes with true bypass switches. Years ago we would have done this with DSP, but not today.... Guitar Distortion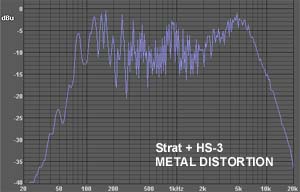
Distortion is the main effect. There is a long history of overdriven tube amplifiers and folk law. There are also many that have gone before that have passed the test of time. DOD250, Tube Screamer, The Ratt , Big Muff and many more.....
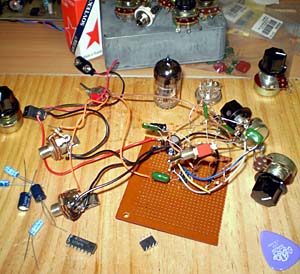
12AX7 Based Tube Distortion + Switchable Hard Clipping
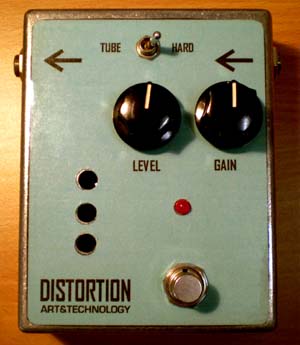
This pedal is based on a starved 12AX7 tube to get an exaggerated tube distortion sound. It is also switch able to get a DOD250 diode clipping sound. Needs an external 9~12VDC adapter using the standard BOSS power connector.
Guitar Speaker Load and Line Level Converter, Phantom Powered Cabinet EmulatorHave also now developed a simple passive Practice Amp (up to 20 WATTS ) Speaker connection to recording output, and as a separate unit, a Phantom powered or 9VDC, Marshall Cabinet Emulator DI with unbalanced and balanced output with ground lift switch. The Speaker to line connection can simply be used with Voxengo Boogex for direct recording. The Marshall Emulator DI can be used in combination with the line out to produce the sound of a mic'ed Marshall cabinet. The combination is something like a poor mans Marshall SE100. 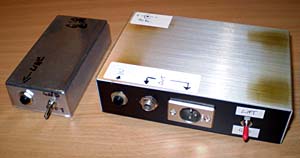
DI is the way to go for small studio guitar recording.
Reaper Based Audio ProductionWe use a studio based around REAPER, ASIO4ALL and a collection of VST instruments, effects and guitar and bass 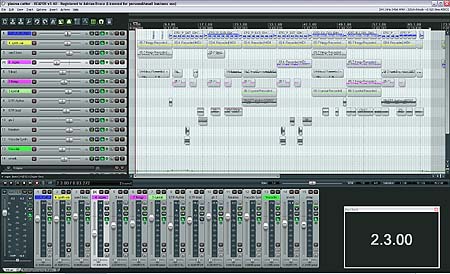
If your audio hardware didn't come with ASIO drivers, ASIO4ALL is required to have low audio latency. Make sure you turn off the software GM synth in windows as per the ASIO4ALL FAQ. For a VSTi GM/GS synth get sfz player, Fluid R3 SoundFonts and the sfARK file decompressor. This will get you back the GM synth capability, and other drum kits and instruments. We use a Roland PC-180 Midi Keyboard Controller connected via a Edirol UM-1ex USB-Midi interface to enter midi tracks. The microphone, a dynamic cardioid ( a Shure SM58 clone), or an Audio Technica AT2020 condenser, connect via a Behringer MIC100. Also have two original Tandy PZM Microphones. You don't need any EQ or pan control when recording. The guitar or bass goes into a tuner, through a pedal, into a CRATE practice amp, via the MIC100, then into the PC. The guitar and bass sound is produced with combination of pedals, the custom hardware cabinet simulator and an Amp Cabinet VST.
DIY Monitor ControllerA Monitor Controller, basically a volume control and some switches, is used to control monitoring speaker levels and speaker routing. As there isn't any need for a traditional mixer, this box handles the monitor functions that a mixer has. 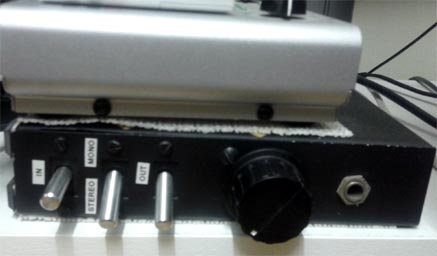
DIY Monitor Controller Schematic
This little controller contains a precision ALPs Dual Ganged volume control, switches to select an input from one of two sources, output to one of two destinations and a MONO/STEREO switch. 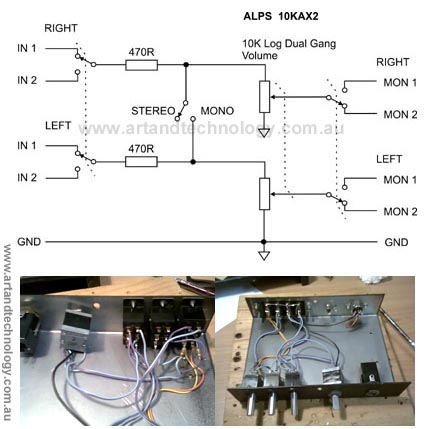
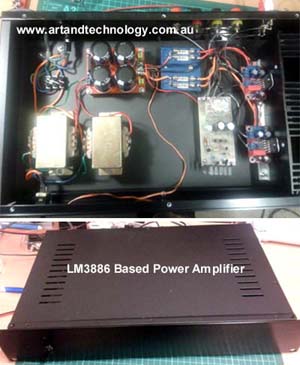
This output switch sends the signal to a DIY LM3886 based 50W Power Amplifier with DC fault speaker protection (was using a Hi-Fi Receiver till it died)
then though a custom speaker switching box to small modified desktop PC speakers (now with 2" 10W 8ohm SWAN B2S drivers), modified Sansui large far field Main Monitors,
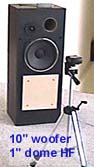
a set of passive 8" 2 way near field monitors, headphones and our AuraClone (the Auratone clone). A recent addition is a mono Samsung Smartphone speaker as well. Mixes are tried out on different speakers to get an idea of what it really sounds like.
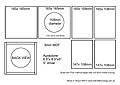
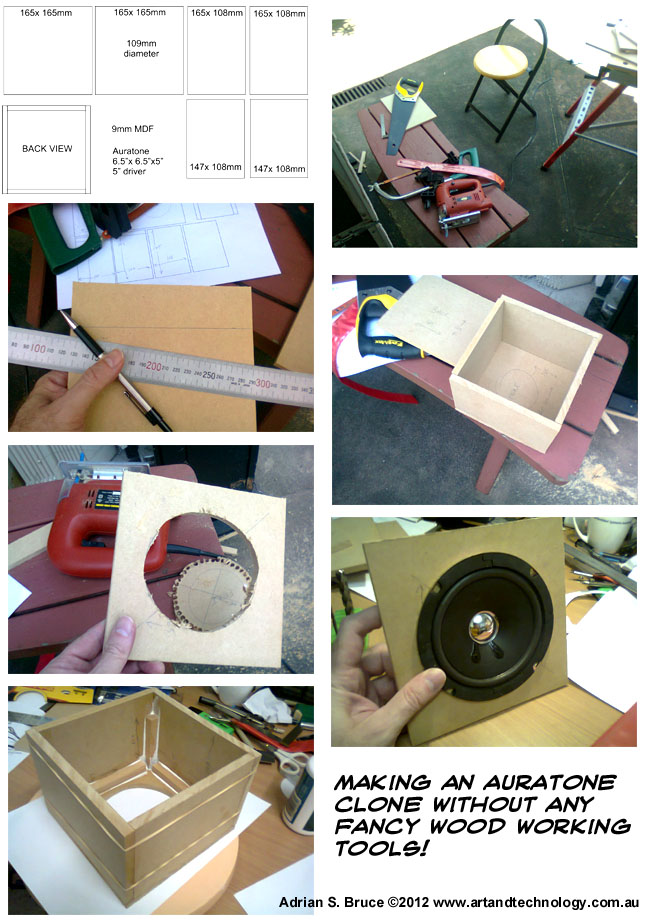
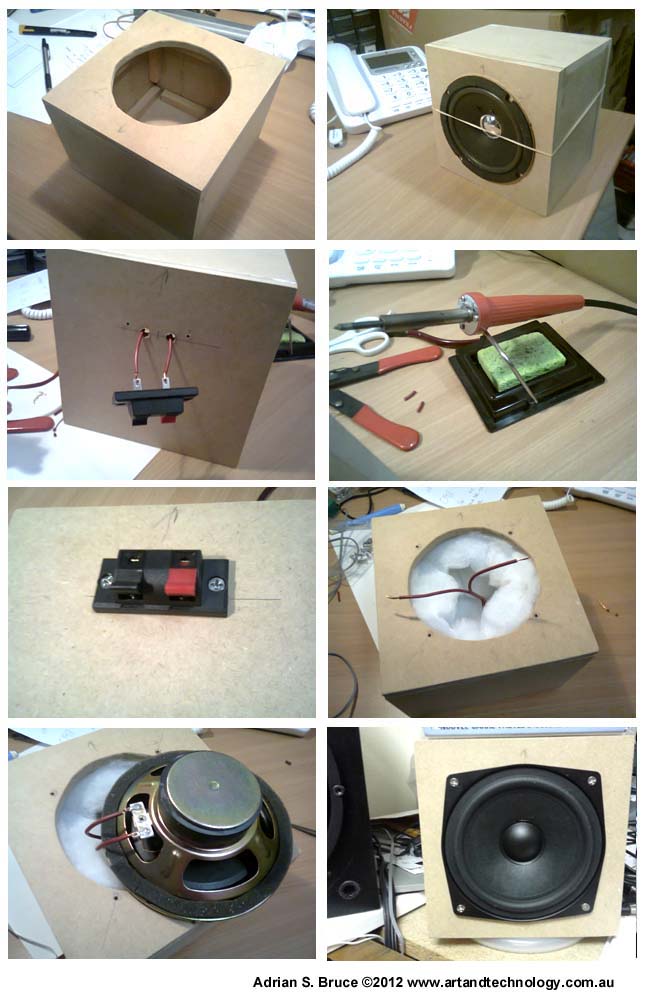
DIY Auratone, the AuracloneWe have designed a single Auratone speaker, the Auraclone. It is constructed from MDF using simple hand tools, and has the same volume and panel rigidity as the originals. There are various options for the 5" speaker, such as the VISATON WS 13E - 8OHM 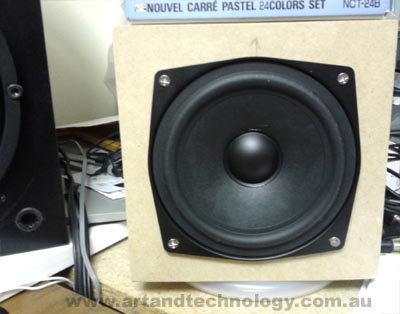
Here are the files for building your own. Click the small images to get the larger files.
The Auraclone is connected to just the left speaker of the speaker selector, and the switching to mono is handled by our monitor controller.
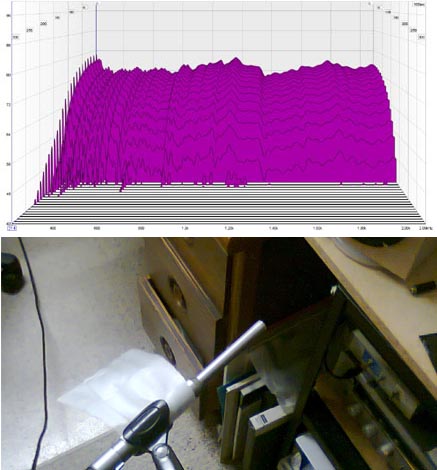
Response & Waterfall Measurements
Doing the Mix & MasteringReaper has all you need to be able to mix and process your recorded tracks. Levels, Pans and everything else can be automated and edited. To make something sound like a commercial CD, level control via automation, compression, EQ, filtering, effects and limiting are all mandatory. The Mix is rendered to a stereo WAV file. Mastering is generally a separate step after producing a mix, after it has been rendered as this stereo file. More EQ and compression, to be comparable with commercial releases. Ozone 5 helps too. This could then be burnt to a CD, but we use Audiograbber to normalize, and convert to an MP3. Some notes are put in via the FileInfo function in WinAmp . The acid test of a mix usually ends up being an MP3 played thru a FM transmitter adapter in the car in peak hour traffic. After revising the mix a few times, it is ready for uploading to the internet.
The biggest improvement you can make when recording a Fender Stratocaster is to shield the internals and change one or more pickups to humbuckers. It just makes such a difference when hum and buzz vanish in the studio.
Acoustic TreatmentDIY acoustic treatment using rockwool or foam panels is required to produce a suitable listening environment. It is more important than what loudspeakers or recording interface you use. Bass management is actually the biggest issue, and the most difficult to treat.If you want to do Bass Traps and HF absorption , like in SoundOnSound Studio Rescues and this DIY Broadband Absorber Panels and Bass Traps, then in Australia, Bunnings Warehouse carries Bradford SoundScreen batts, the local brand for the rockwool material. Australian company SoundAcoustics have a range of reasonably priced foam tiles and diffusers available from their website store. However note that, no foam product lasts forever, and they are not as effective for bass trapping. Rockwool is related to asbestos, (without the known health risks) and in Australia there are other, possibly safer materials that can be used. Tontine Acoustisorb 3 being one, at something like 3 times the price of rockwool, and a set of articles on using it is Tontine Acoustisorb 3 bass traps 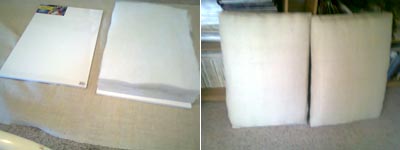
Small studios need bass trapping more than flutter echo control and we are experimenting with way thicker then normal, safe, hung panel designs. Hessian over absorber and artist's canvas frames. Having said all that, it is actually not really practical to perfect any small studio room in a non commercial environment, and all treatments relieve, but not eliminate any problem it may have.
Mains Control Tone InterferenceDepending on where you are, you can get feed through of the mains control tones in to some part of your audio system. In Queensland and NSW Australia, the power companies use a 1V 1050Hz tone on the mains for system control and switching. This can come through in fluorescent lighting, dimmers, fans and power amps. It is sent several times an hour 24 hours a day. Mains filters to get rid of these Zellweger tones are available from :
A 1A device for a single appliance, or a larger unit for the switchboard are available. And some of our tracks
Home
|