This is an article on how I do the caricatures using pencil, paper, pens and Photoshop or CorelDraw. This article is about cars, but the same approach is used for people as well.
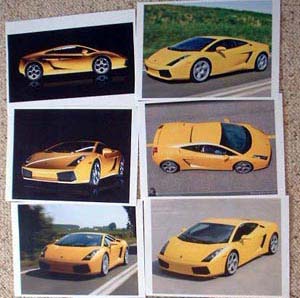
Reference material collected from magazines, the internet or anywhere else, of your subject is required. Most artists have collections of such reference images, they refer too.
Caricature
Caricature is a process of exaggerating features of the subject for a particular effect.
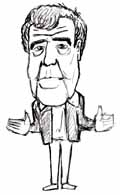
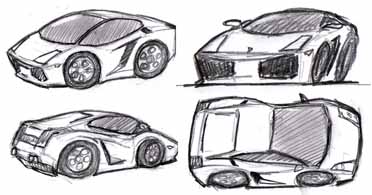
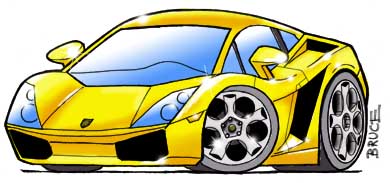
For people is it usually a big head on a little body, and facial features made larger or smaller to exaggerate their characteristics, yet keep them recognizable. This rough thumbnail shows a traditional big head small body, and not just because it is Jeremy Clarkson from Topgear. He also waves his hands around a lot, and so they are drawn big too. Here are some possible variations on the cartoon Lamborghini Gallardo:
For cars, it is usually big wheels, engines and what ever features that make the car unique. Making the wheels big, makes the body squat, and wide.
Rough Thumbnail Sketches
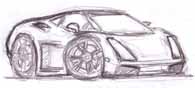
Using the photos as a guide do small sketches that capture the feel of the car you're after. I use a very loose scribble approach, where the final line is going to be in there somewhere, I just haven't made up my mind where it is at this stage. The first sketch shown here really was very small. I based the completed caricature on the one above.
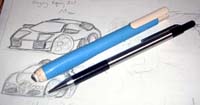
I do these using a mechanical pencil with a 2B lead. Makes for a soft thick line. I also use a pen like eraser at this stage too, to get ride of stuff that is too wild.
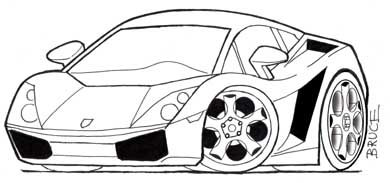
The Line Drawing
Once I have an image I like, I scan it, using a flat bed scanner, into Photoshop at 300dpi, and then scale it so that it is A4 paper size. I then print this out in gray scale. You can use a photocopier to enlarge your thumbnail too.
I then place that under another piece of paper and trace over this large rough image, sometimes using drawing templates, to get nice clean lines pencil. I use a lightable to see the lower image clearly.
I then go over the pencil with pens. Currently using PICMA MICRON 05 and Artline black markers. The outlines of components are made thicker to make the image pop.
The pencil is then erased using a knead able eraser, so the paper isn't damaged.
Rendering the Line Art in Photoshop
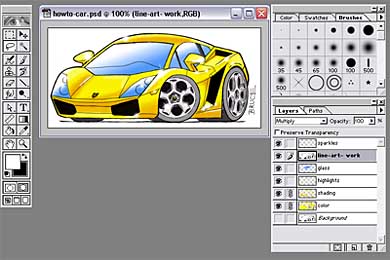
The Line Art is then scanned at 300dpi and processed to be completely black and white. This is then placed on the top layer, and set to multiply, so that it will allow any painting on lower layers to appear under it, and still keep the black outline. For print, coloring is usually done in CMYK, but will do this in RGB here. The image is also worked on at A4 300dpi or larger. The image below has a car only 390 pixels wide instead of 3296, only to make the layers menu easier to see. We put different layers of paint on different Photoshop layers to make changing the effect easier. We are not going for the photo real look here. Something just a bit more than cell animation. Photo real rendering also takes longer.
A WACOM 8" x 11" tablet is used for the painting in Photoshop. Base colors are effectively flood filled. But if using the bucket tool, the selection must be expended first, so color overlaps the black outline, but doesn't go outside it.
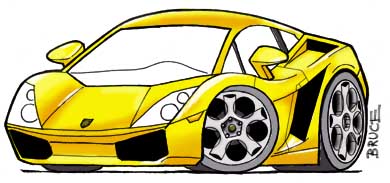
Shading
A selection is made, and then hidden and a large airbrush used to put down some graduations, using another color, NOT just the same color with black added. Shading also added to the wheels. You need to take into account where your light sources are. You also need to select your values such that the shading is still visible when the image is reproduced in black and white instead of color.
Specular Highlights
White is then added with a brush.
Sparkles and Windows
A layer above the line art is then used to add some sparkles with white and a fuzzy paint brush. white star lines are then added and blurred. The windows areas were also selected and a gradiant fill, used from white to sky blue, on another layer.
Photo real rendering requires then doing all the body reflections. It can add hours to the process, so it really depends on who the illustrations are for, or what your style is.
What do you use that for?!
We do commissioned graphic design work to your requirements, but also have The Webcomic: Heavy Metal Garage (HMG) CARtoon Series Comic Strip, updated often..
This is mostly done using the technique above. However text, ballons and the frame are done using vectors, explained in the following.
Vector based Hot Rod caricature in CorelDraw
A vector based design is the same till the line drawing stage, then the pencil lines are colored blue in Photoshop, then that image is brought into CorelDraw as a back layer. Manually traced objects are then added on additional layers using the pencil layer as references.
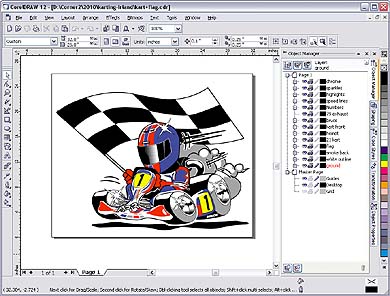
The image below shows the approach to using layers and building up objects to form a gokart caraicature in CorelDraw. This allows, for example, large trailer signage usage.
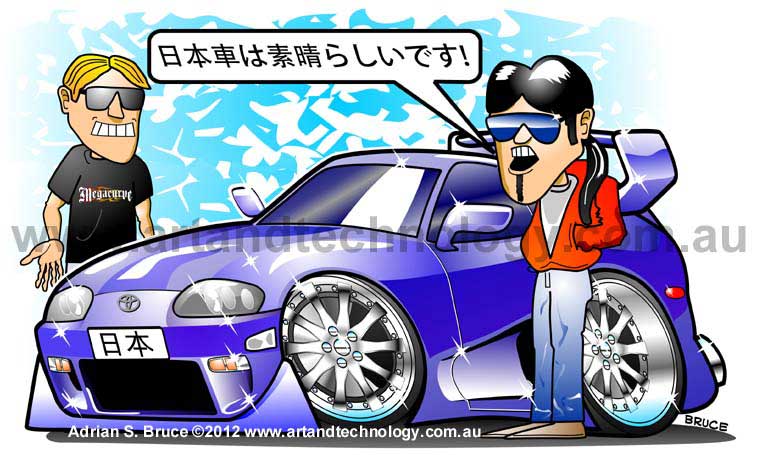
Vector based Hot Tuner Car and Caricatures in CorelDraw
This example Tuner Car is a more detailed with multiple graduations. The background, caption and characters also create more interest.
Vector 1957 Chevy Hot Rod Cartoon Poster in CorelDraw
This example Chevy Poster also has details and reflections created with with multiple graduations. The background, and title also create more interest. This is a large poster available at our Zazzle Online Store .
How to Draw a Vector Truck Cartoon Illustration using 30 layers
This shows the final layers, but while rendering, you mostly work with just the object outlines to be able to see the sketch and perspective lines as required. When moving onto another layer, you usually hide the layers you don't see or need as well.
Once the layers are done, the starting sketch and perspective lines are hidden or deleted. Much of the finishing work I do is actually done in Illustrator.
Music is Megacurve - Plasma Cutter. Metal guitar and synths, with a vocoded voice saying "plasma cutter"...
References
Some very good books, on the actual drawing and production, the last is an eBook: